Last Update | |
Created | 24 March 15 |
Products | WP Plugin,White Labels,Mobile Apps,B2B Software,Trip Composer,Corporate/Self Booking Tool |
Documentation | Well Documented |
FAQs | Travel API Integration,Hotels API Integration,Flights API Integration,Payment Gateway Integration |
- Home
- GDS/OTA Integrations
- Travel Booking Plugin
- White Label Travel Portal
- B2B Travel Booking Software
- UPI Payment Gateway
- Automate Offline Bookings
- Corporate Travel Booking Tool
- Itinerary Builder
- Utility Bill Payment
- Gift Cards and Loyality Program
- Travel Agency APP Builder
- Travel APIs
- Partner with us
- Video Guides
- Portfolio
- Testimonials
- Documentations
- adivaha® B2C White Label
- About adivaha® B2C White Label
- Setup & Installation
- My Themes
- APP Store (3rd Party API Integration)
- Change Password
- Manage Wallet
- Load Funds
- Transaction History
- Go Live
- Back Office
- Global Settings
- Upload your logo
- My Bookings / Cancel Bookings
- Manage Profile
- Setting a Markup
- Customize Searchbox
- Custom Styling (CSS)
- Payment Gateway
- SMTP Settings
- Settings
- Manage Pages
- Addons
- Whatsapp Notifications
- Chatbot Settings
- Multicurrency
- Travel Insurance
- Manage Cashback
- Manage Discount Coupons
- Meals & Baggages (SSR)
- Refund Protect
- Hold Bookings
My Themes - B2C White Label Travel Portal
Home » Documentations » B2C White Label Travel Portal » My Themes
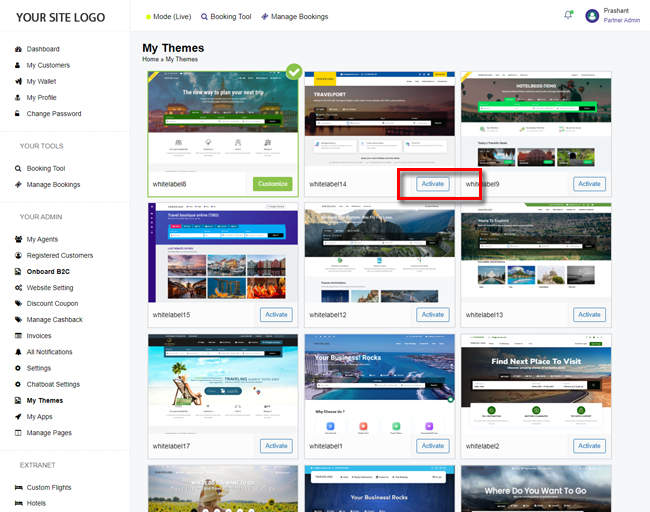
1. Login to your back office and navigate to My Themes

2. Activate the theme that you find closer to what you need. It takes few minutes to propogate your dns.

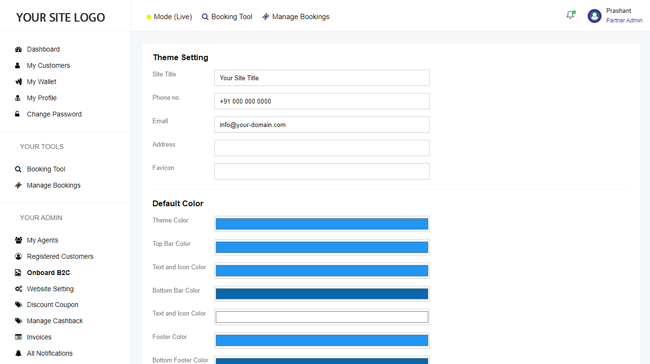
3. Click Customize to customize the content of the home page.
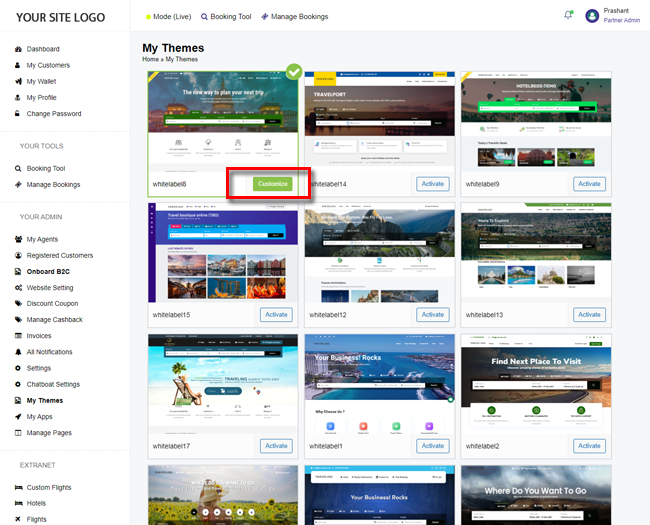
4. Click Save.
