-

HTML Template Designs
-

WordPress Travel Plugin
-

Crossplatform Widgets
-

White Label Travel Portal
-

B2B Travel Software
-

Travel Agency APP Builder
-

Itinerary BuilderNEW
-

Corporate Booking Tool
-

Travel XML APIs
-

Travel Marketplace
-
GDS/OTA Solutions
-

Travel Chatbot
-

Testimonials
-

Gift Cards and Loyality
-

Documentations
-

Blogs
-

FAQ-Frequently Asked Questions
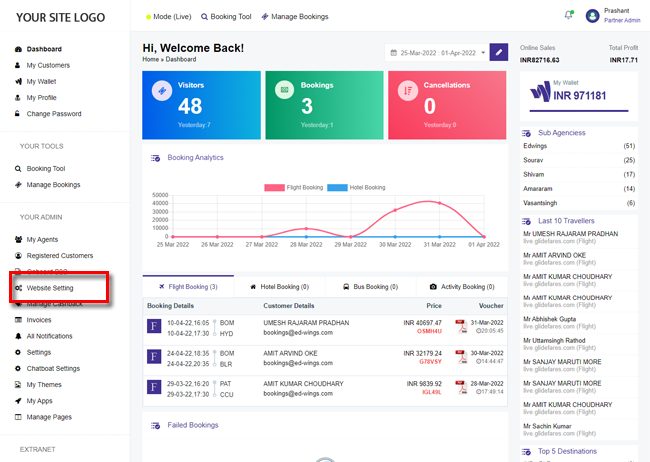
Advance settings - Writing Custom CSS in Your B2B Travel Portal
Home » Documentations » B2B Travel Portal » Advance settings
Take total control over the design by writing your own css through Advance settings.
- Exclude " style " tags
1. Login to your back office and navigate to Website Settings > Advance Settings
2. You can write/edit your css and click Save Setting
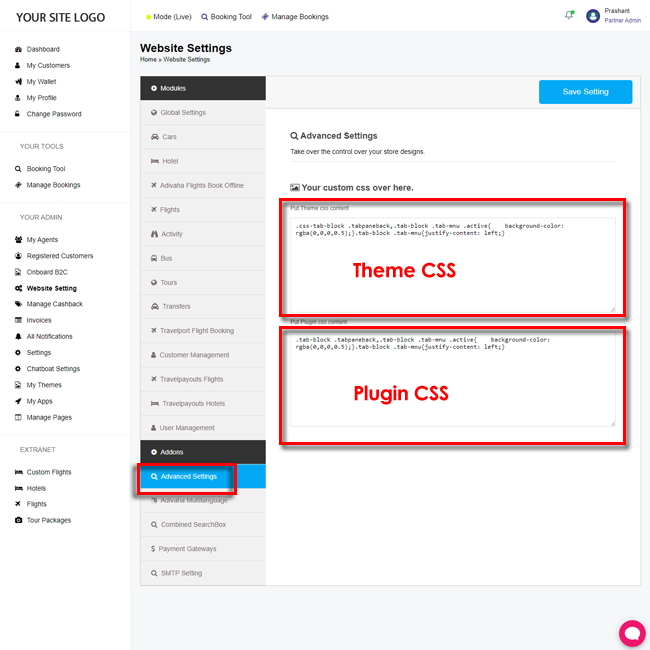
- Theme Css: The css written would be applicable on the theme part, ie, Header, Footer, home page and informational pages.
- Plugin Css: As the name suggests, it would be applicable on the booking engine elements, ie, Search box, Search Results, Booking and Confirmation pages.