-

HTML Template Designs
-

WordPress Travel Plugin
-

Crossplatform Widgets
-

White Label Travel Portal
-

B2B Travel Software
-

Travel Agency APP Builder
-

Itinerary BuilderNEW
-

Corporate Booking Tool
-

Travel XML APIs
-

Travel Marketplace
-
GDS/OTA Solutions
-

Travel Chatbot
-

Testimonials
-

Gift Cards and Loyality
-

Documentations
-

Blogs
-

FAQ-Frequently Asked Questions
Setting Up SMTP For B2B Travel Portals - Step By Step Guide
Home » Documentations » B2B Travel Portal » SMTP Settings
Send the transactional emails (ie. registration and booking emails) through your business email (ie. no-reply@yourwebsite.com).
- You can obtain your SMTP Settings from your provider's dashboard (ie. Godaddy, Bluehost, Hostgator etc)
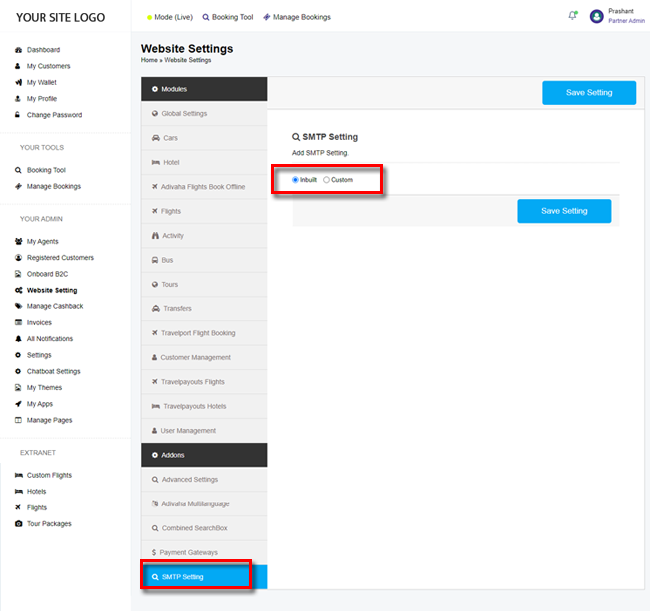
1. Login to your back office and navigate to Website Settings > Addons > SMTP Settings
2. Click Custom option button .
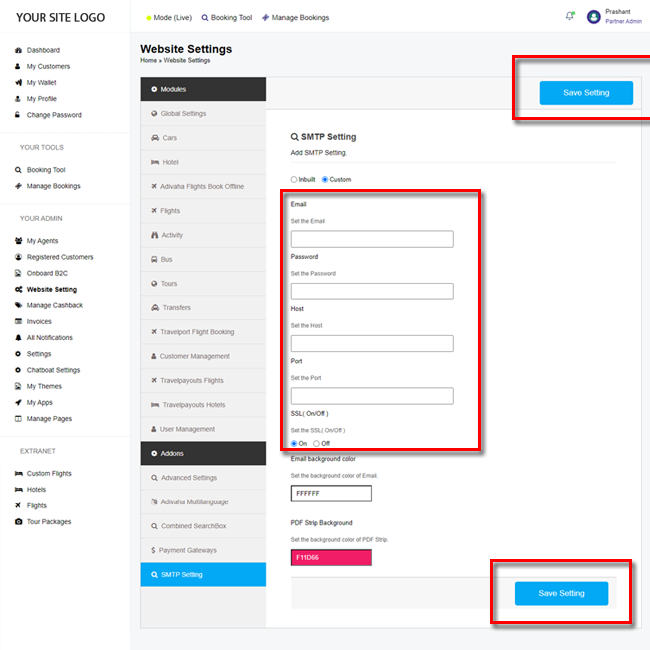
3. Enter your SMTP details and click Save Setting.
4. If your SMTP settings are correct and not restricted by your provider. Your customers should now be receiving emails through your business email.
- Set the Email: Sender email id that you wish to send emails from (ie. no-reply@yoursite.com)
- Password: Password of the email id
- Host: SMTP Host of your email exchange (ie. smtp.yourwebsite.com)
- Port: Port can be 465 or 995
- SSL: Switch the SSL on and off depending on your
- Enable background color: Give your email tempates a base color, in case if your logo is white or transparent.
- PDF Strip background: Match the green strip color (in E-Tickets and E-Vouchers PDF) with your website color combination