-

HTML Template Designs
-

WordPress Travel Plugin
-

Crossplatform Widgets
-

White Label Travel Portal
-

B2B Travel Software
-

Travel Agency APP Builder
-

Itinerary BuilderNEW
-

Corporate Booking Tool
-

Travel XML APIs
-

Travel Marketplace
-
GDS/OTA Solutions
-

Travel Chatbot
-

Testimonials
-

Gift Cards and Loyality
-

Documentations
-

Blogs
-

FAQ-Frequently Asked Questions
Quick Tutorial: How To Upload Your Logo into a B2B Travel Portal
Home » Documentations » B2B Travel Portal » Upload your logo
The size and location of the logo in the header is determined by the store theme. Your logo can be saved as either a GIF, PNG, or JPG (JPEG) file type and uploaded from the back office.
- In addition to the logo in the header, your logo also appears on email templates and on PDF invoices and other sales documents.
If you do not know the size of the logo or other images used in your portal, open the page in a browser, right-click the image, and inspect the element.
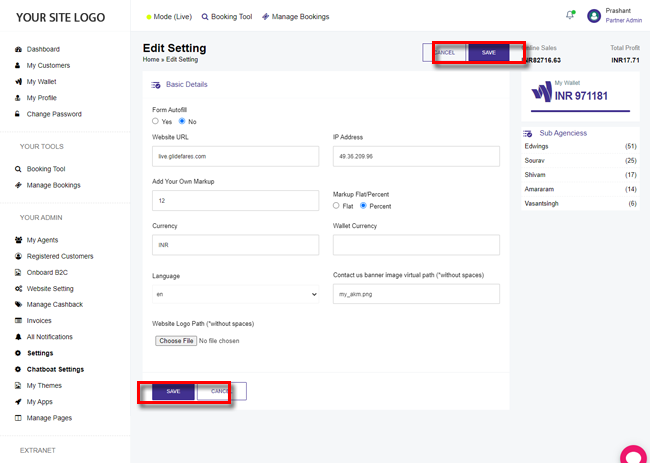
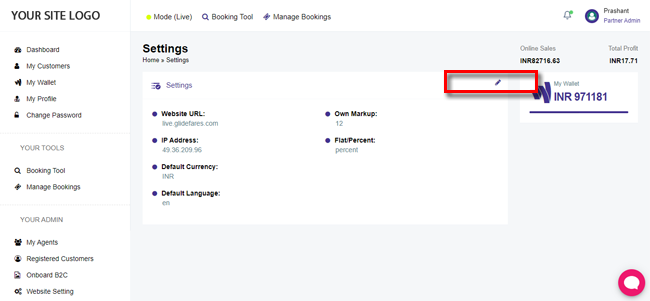
1. Login to your back office and navigate to Settings
2. Click the pen icon in the right corner
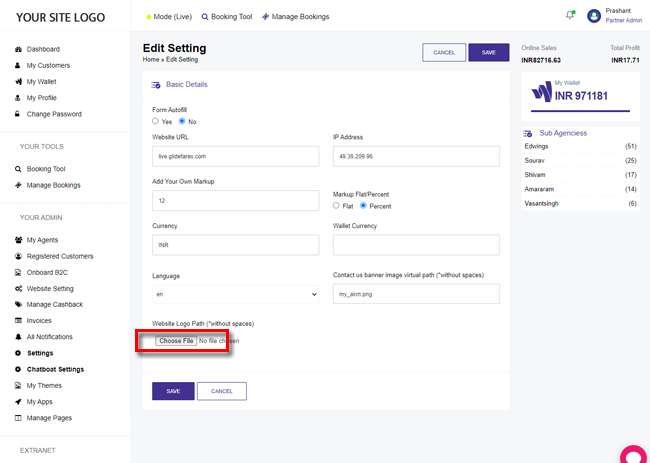
3. Upload your own logo from your desktop
4. Save the settings and your new logo should now reflect in your website and dashboard.