-

HTML Template Designs
-

WordPress Travel Plugin
-

Crossplatform Widgets
-

White Label Travel Portal
-

B2B Travel Software
-

Travel Agency APP Builder
-

Itinerary BuilderNEW
-

Corporate Booking Tool
-

Travel XML APIs
-

Travel Marketplace
-
GDS/OTA Solutions
-

Travel Chatbot
-

Testimonials
-

Gift Cards and Loyality
-

Documentations
-

Blogs
-

FAQ-Frequently Asked Questions
Activate Payment gateway - WordPress Travel Plugin
Home » Documentations » WordPress Travel Plugin » Activate Payment gateway
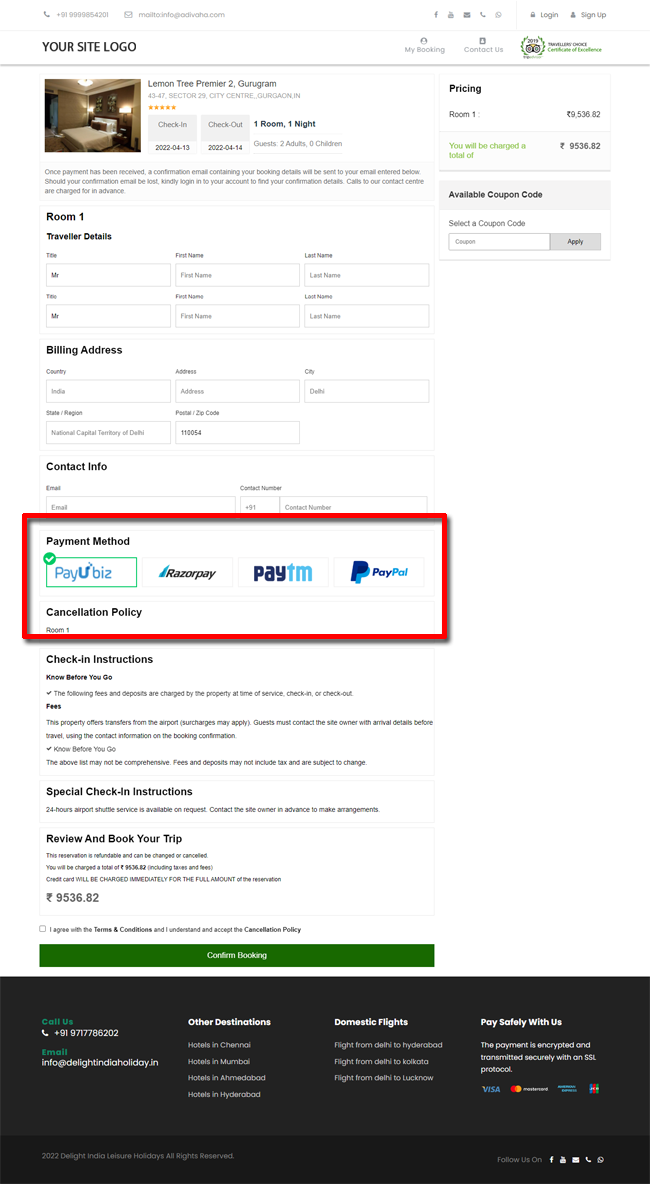
Activate or deactivate payment gateway on the fly. Offer multiple payment options.
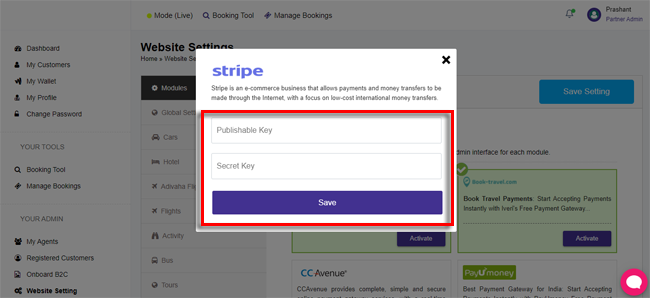
- You can obtain your API Keys from your merchant account
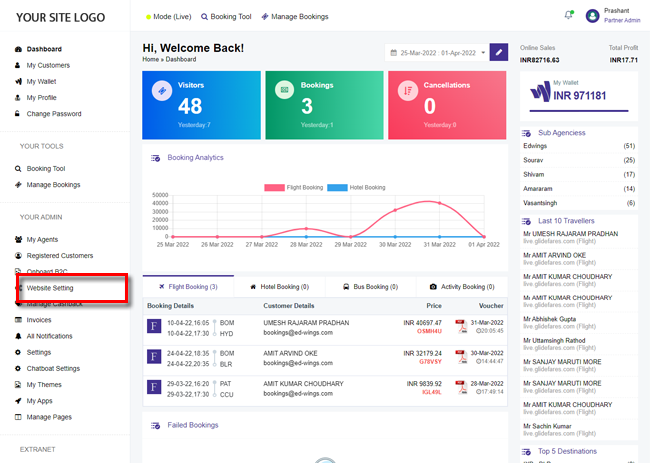
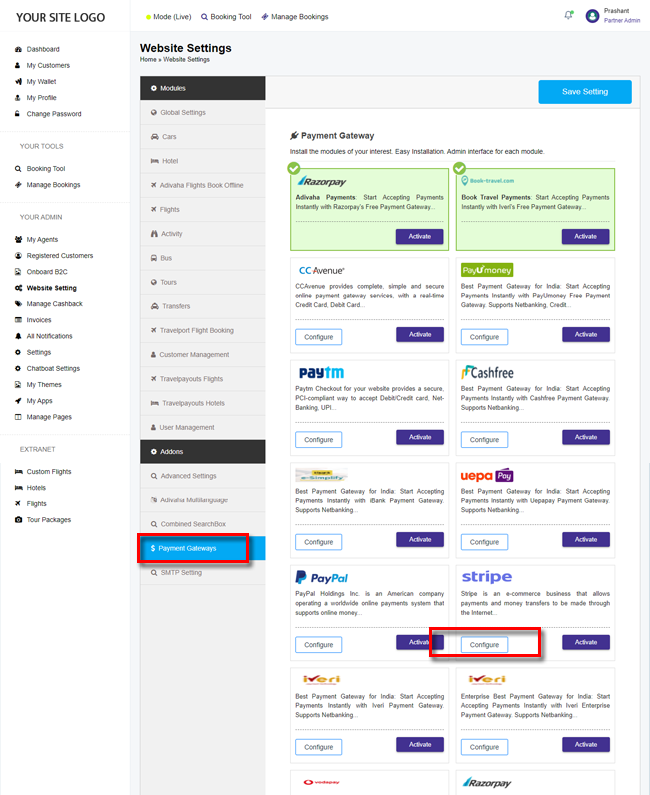
1. Login to your back office and navigate to Website Settings > Addons > Payment Gateways
2. Click Configure button of the payment gateway you wish to activate.
3. Enter your API Key details and click Save button.
4. Your customers will now be able to pay for the bookings through the configured payment gateway.