


-
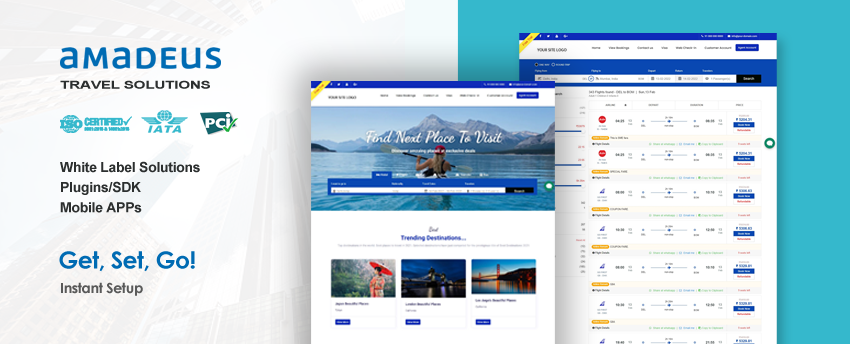
Welcome to the Installation guide of White label solution based on Amadeus Self Service API.
You must have Amadeus Self Service API credentials to set up the Amadeus White Label Web Portal. You may register here and obtain your Self Service API Keys. The first step would be to point your domain’s “A” record to the IP Address and then register your business with adivaha®.
Click this link to learn more about setting up the DNS “A” record. Most of the time the domain gets pointed instantly, but in some cases, it may take up to 24 to 48 hours
Once the domain starts pointing. You can then navigate to the Amadeus White label setup page. Then enter your domain name and hit “Register” your business. If you see a popup stating “Please point your domain to IP address”, then quite possible, either your domain is not yet pointed to the IP Address or you pointed it recently, Allow it some time.
If all goes well, you will be taken to the next screen wherein you can put your business details. Press next.
It should now take you to the credentials page. You can now feed the Amadeus API keys here and set the environment to test if you have test API keys or LIVE if you have production keys.
Next would be the Themes screen, where you can select the theme that best fits your business and hit next.
You will now land to the thanks page where you can find the link to your website and back-office. Your back-office credentials should have been sent to your email. Though the setup is almost instantly it may take around 24-48 hours to propagate worldwide
Admin and Intro to the dashboard and analytics
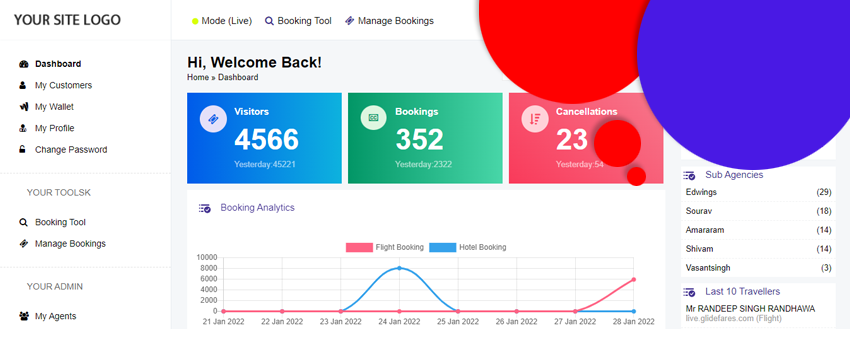
Once your site is up and running, you can put slash “/admin/” in front of your domain name and it will take you to the admin interface. You can then put the credentials that you entered at the time of setup and press submit. You will now land to your back office dashboard which gives you brief analytics of how your business is doing. This includes a number of unique visitors, bookings, cancellations, recent bookings, upcoming bookings, cancellations, etc.
You can filter the dashboard as per the selected dates. As you can see most of the menus in the left panel are self introductory, but we will go through the main ones in the next slides.
Change Logo and Profile Information
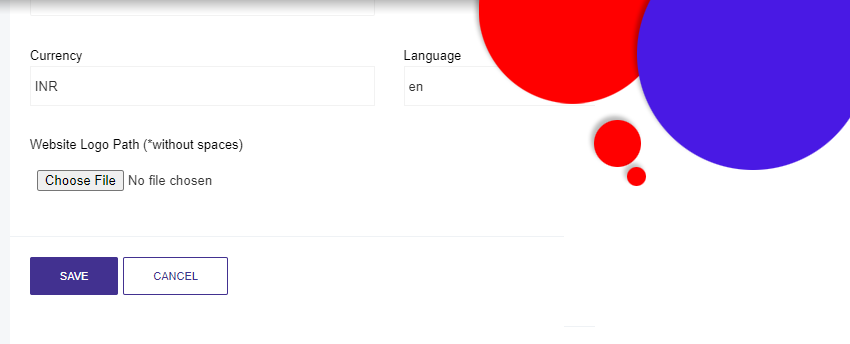
First thing that might interest you is to change the logo with yours. You need to go to the Settings which you can find in the left menu. then click on the pen icon and upload the image. You will be able to see the new updated logo once it gets uploaded successfully.
Multiple Designs
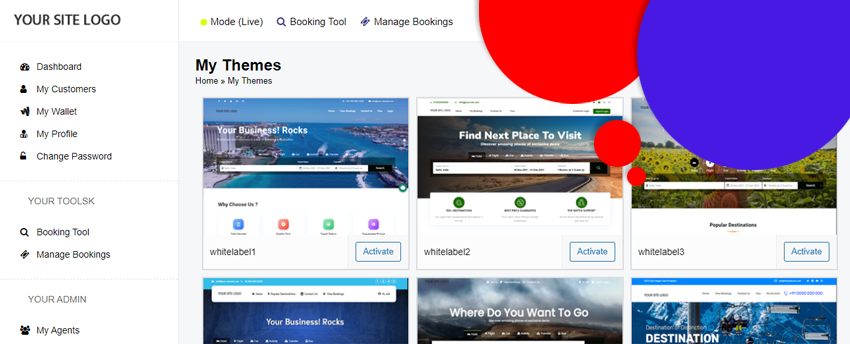
You can customize the website look and feel with different pre-made designs or write your own CSS to customize it even more. In order to change the website template, you can click on my themes -> switch to the theme of your choice and then customize the text and images of the theme. If you would like to change the search box or the search results layout, you need to go to the Website Settings -> Combined Search Box and then change the version and hit save settings. If you are a developer and wish to customize it with CSS, click on Advance Settings and write your own CSS on top of the pre-built solution.
Configure SMTP Settings
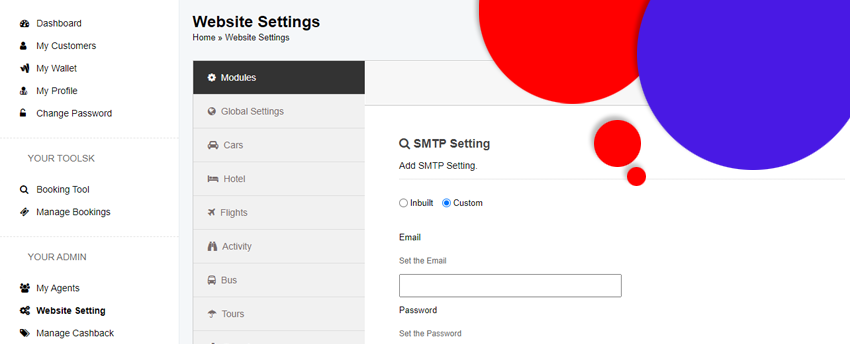
You can set up your SMTP if you wish to send confirmation and cancellation emails to your customers through your email id. You can navigate to Website settings, then SMTP and fill in your SMTP details or use the inbuilt Email service.
Setting up a Markup
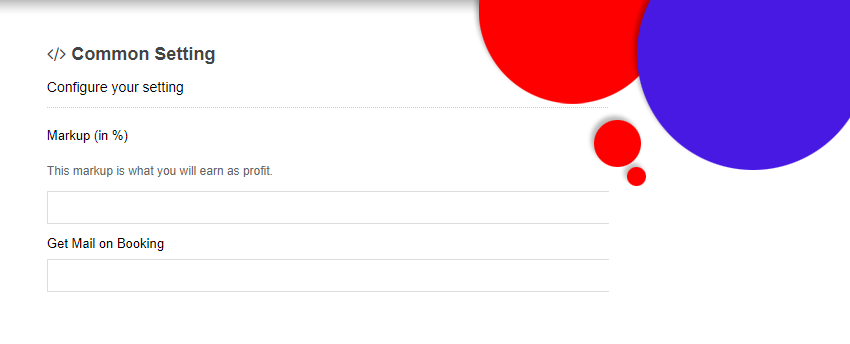
Easy markup management lets you add your profit on top of the net fares received by the Amadeus. You can navigate to the Website settings, then select the module you wish to add a markup. In this example, we would like to add 3 percent. We will click Flights and then set 3% as markup and hit save. Now customers will see and pay the marked-up amount that you have set here in the back-office.
Manage Bookings
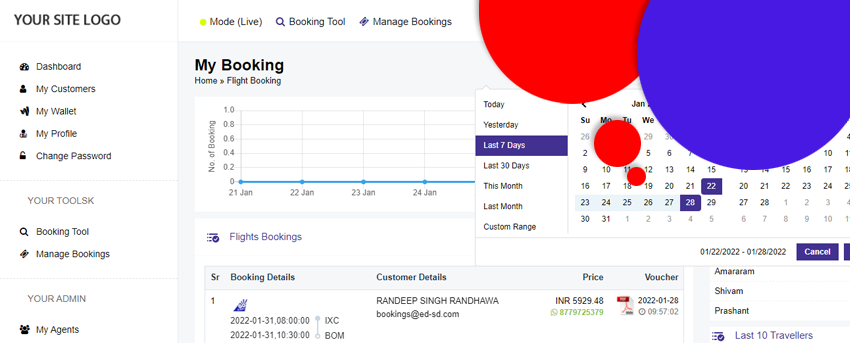
In order to manage bookings, We can click on the Manage Bookings, then select the service, in this case, we will select flights and now we can see all the bookings that are made through the website. We can filter the bookings as per the selected dates. We can download the E-Tickets and E-Vouchers and even cancel the bookings.
Setting up a Payment Gateway
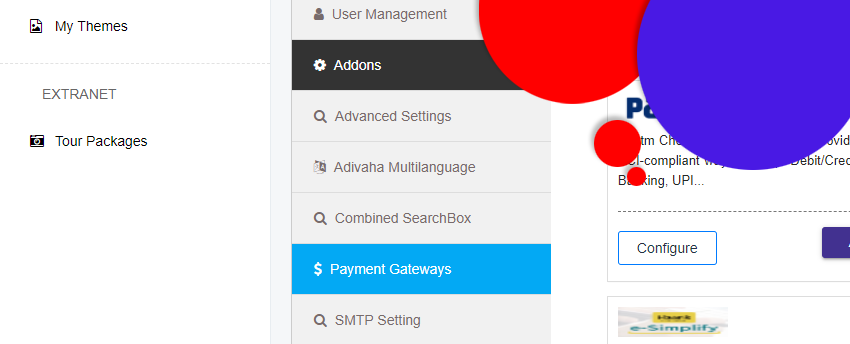
Whitelabel solution comes with many integrated payment gateways to receive payments from your direct customers. All you need to do is to configure and activate the payment gateway of your choice. In order to configure your payment gateway, navigate to Website settings, then Payment gateways. You can configure the payment gateway that you wish to use, enter the key details and then click Save. Your payment gateway is now configured on the booking page of all your services.
24X7 Help Desk
Help desk lets your customers view, email, and WhatsApp their bookings at ease. They can even cancel and modify their booking with the automated bot which works 24 by seven on behalf of you. This can be activated from the right panel of your dashboard. This tool lets your customers, re-download vouchers, re-send confirmation emails, and much more without any manual intervention.
Agent Registration (B2B, Business to Business)
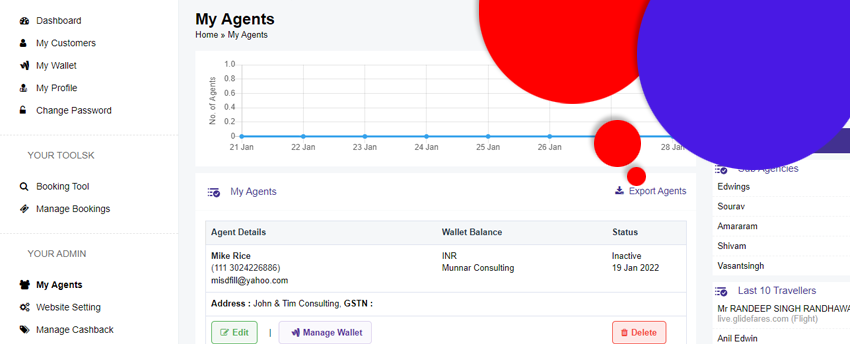
Onboard unlimited agents, moderate and allocate credits to them. Your agents will be able to register into your B2B solution. You will then add your own markup on top of your agents and activate their accounts. Now your agents will be able to manage the cash balance with you and you can load the credits into their account, which they will be able to use it in their bookings. Your agents will be able to add their own markup and do the bookings for their customers. Once your agent registers through your B2B portal, you can then navigate to My Agents, and then Edit. Click on the pen icon enter the markup that you wish to set, activate the agent, and then save. The agent will receive an email once his account gets activated, they can then login into his account and do the bookings within their credit limit. If you wish to load credit onto your agent’s account. go to My Agents then Manage wallet, enter the amount that you wish to load and then click Fund wallet. Your agents can even load credits into their wallets through the configured online payment gateway.
Please let us know in the below comment box if you have any questions.
Set Up a White Label Based on the Amadeus Self Service API
Recent Posts


Leave a Reply